Guide · 4 September 2026 · 8 min read
How to use Scolia with Autodarts on the same dartboard
Scolia or Autodarts? If you already own a Scolia system, you may not actually have to choose.
With three inexpensive USB switches and a separate computer, it is possible to use the cameras already installed around your Scolia dartboard with Autodarts as well. No second dartboard, no second set of cameras, no second lighting system.
When you want to play Scolia, your cameras connect to Scolia as normal. When you want to play Autodarts, press three buttons and route those same cameras to your Autodarts computer instead.
Here is exactly how the setup works, what hardware you need, and how to switch between the two without repeatedly unplugging your cameras.
Can you use Scolia cameras with Autodarts?
Yes — provided your Scolia installation uses the standard three USB-connected scoring cameras and you have a separate computer available to run Autodarts.
The important distinction is that you are not installing Autodarts onto the Scolia processing unit. You reuse the physical Scolia camera and lighting installation while running Autodarts on another computer — a suitable laptop, a Raspberry Pi or a mini PC.
Autodarts receives the camera feeds over USB, analyses the board and works out where every dart landed. A Scolia installation already gives you the difficult half of that: the cameras are mounted, the angles are established, the board is lit and the cables are run. All that is missing is a way of deciding which computer receives each camera feed.
That is what the USB switches do.
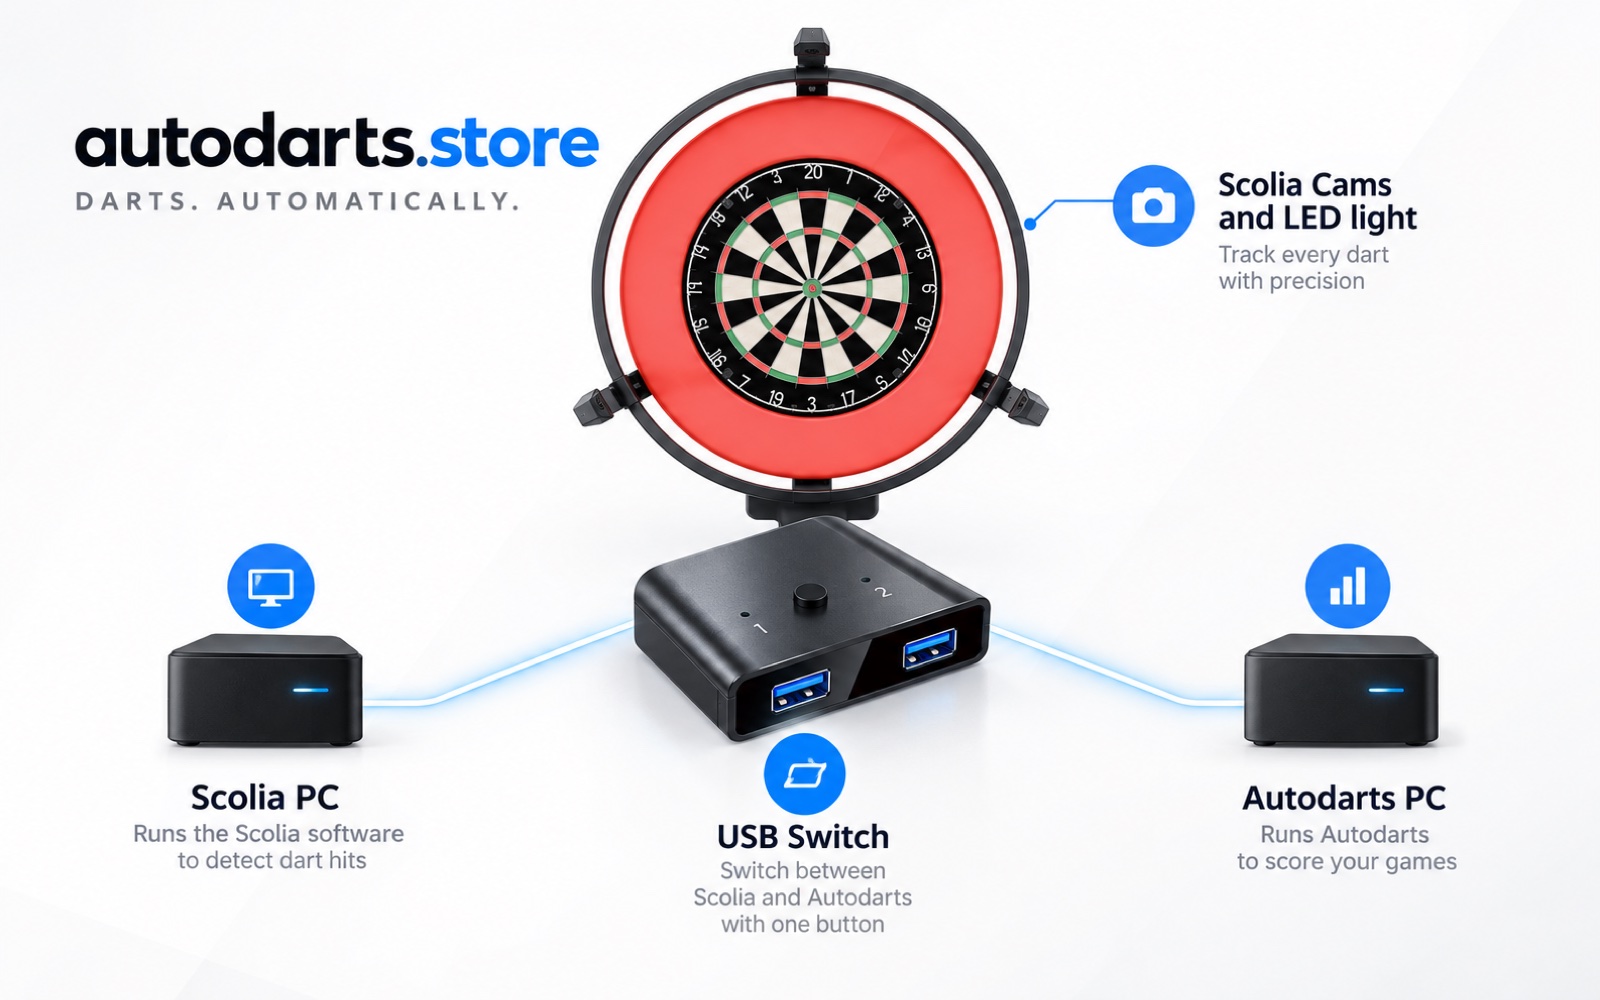
How the Scolia to Autodarts setup works
Normally each of your three Scolia cameras connects directly to the Scolia processing unit. You could unplug those three USB cables and connect them to another computer every time you wanted to use Autodarts. It would work in principle, and it would get old by the second week.
There is a second problem. If cameras are reconnected in a different order, the software can see a different camera configuration — which means correcting the setup or recalibrating, at the exact moment you wanted to throw.
A USB sharing switch solves both. Each camera connects to its own switch, and that switch stays permanently connected to both the Scolia processing unit and your Autodarts computer. Press the button one way and the camera talks to Scolia. Press it the other way and it talks to Autodarts.
Repeat for all three cameras and you have a dual-platform automatic dartboard.
What you need
For a standard three-camera setup, the complete parts list is:
- ✓Three USB 3.0 sharing switches — one per camera
- ✓Matching USB data cables to reach the second computer
- ✓A computer to run Autodarts
- ✓Your three existing Scolia cameras
- ✓Your existing Scolia lighting — already installed
A word on cables
Our switch kit is the three switches. The camera cables you already have keep doing their job — they just plug into a switch now instead of straight into the Scolia unit. What you may need to add is the run from each switch to the second computer.
Use matching cables of the same length and specification, and keep them as short as the layout allows. USB camera feeds are continuous data, and unnecessarily long or poor-quality cables are a common cause of a camera that works on the bench and drops out on the wall. Three tidy leads beat whatever spare USB cables are in the drawer.
Why you need three USB switches
Scolia uses three scoring cameras around the dartboard, and each one has to be switchable between two computers: the Scolia processing unit, and the Autodarts computer. One switch handles one camera, so three cameras need three switches.
Camera 1 goes to switch 1, camera 2 to switch 2, camera 3 to switch 3, and every switch has a lead to each computer. Once installed, the cables stay connected permanently — you only ever press the buttons.
Step 1: label the three cameras
Before disconnecting anything, identify the USB cable belonging to each Scolia camera and mark them 1, 2 and 3. Label the switches to match.
This sounds trivial and it prevents the single most common problem with this setup: reconnecting cameras in a different order. Once the installation works, every camera should stay on the same path permanently.
Step 2: disconnect the cameras from the Scolia unit
Power the system off and disconnect the three scoring-camera USB connections from the Scolia processing unit.
Do not touch the cameras themselves. Do not change their positions or angles. The whole point is to leave the physical installation exactly as it is and change only where the USB signals go.
Step 3: connect each camera to a switch
Camera 1 into switch 1, camera 2 into switch 2, camera 3 into switch 3. Each switch now receives the feed from one camera.
Step 4: connect the switches back to Scolia
Run one computer-side connection from each switch back to the Scolia processing unit.
You now have essentially the original Scolia installation again, with a switch sitting between every camera and the processing unit. Set all three switches to the Scolia side and Scolia sees its three cameras exactly as before.
Step 5: connect the other side to your Autodarts computer
The remaining connection on each switch goes to the Autodarts computer. Three cameras, three switches, two possible computers.
All three switches on Scolia and you play Scolia. All three the other way and Autodarts gets the cameras instead.
What computer do you need for Autodarts?
You do not need a gaming PC. What matters is enough reliable USB bandwidth for three simultaneous camera feeds, a modern quad-core processor and 8GB of RAM — our guide on which computer to use for Autodarts goes through the trade-offs between a spare laptop, a Raspberry Pi and a dedicated mini PC.
A mini PC is the natural fit here because it can live permanently beside the board, start with the system and connect straight to the display above it. Ours arrive with Autodarts installed and tested on a real board.
Step 6: install and configure Autodarts
With all three switches set to the Autodarts side, start the mini PC and install Autodarts. Create your board and run the normal camera configuration and calibration.
Because the Scolia cameras are already positioned around the board, you are reusing camera geometry that is known to work rather than building a second physical system. Once all three cameras are visible, calibrate.
After that, leave the cameras and the USB wiring alone. From this point on, changing platform is only ever a matter of switching the camera feeds.
What if Autodarts only detects one or two cameras?
Do not recalibrate everything. Check the USB path first.
- ✓Make sure every switch is on the Autodarts side
- ✓Check cameras 1, 2 and 3 have not been swapped between switches
- ✓Check every cable connection at both ends
- ✓If the computer has several USB ports, move the affected connection to another one
- ✓Avoid excessively long USB cables — short, matching data cables beat whatever spare leads are in the drawer
How to switch from Scolia to Autodarts
Once installed, changing platform takes seconds. Finish your Scolia session and shut the scoring unit down or off as appropriate. Change all three switches to the Autodarts side. Start or wake the Autodarts computer, open Autodarts and play. Reverse it when you want Scolia back.
No disconnecting cameras. No removing Scolia hardware. No second auto-scoring dartboard on the wall.
Can you use the same monitor for both?
Yes. If you already have a monitor or TV above the board, the Autodarts mini PC can use it too, so both systems share the dartboard, the cameras, the lighting and the screen.
Exactly how you switch the display depends on how your setup is wired, but a permanent mini PC beside the board makes it straightforward.
Why run both Scolia and Autodarts?
Scolia and Autodarts each have their own communities, features and approach to automatic scoring. If you already own Scolia, replacing the whole system because you also want Autodarts makes little sense.
You might play Scolia most of the week and switch to Autodarts to play friends on that platform, or to enter an Autodarts tournament (free on any account), or simply to try new Autodarts features as they land.
Rather than treating it as an either/or decision, you can have both on one board.
Is this converting Scolia to Autodarts permanently?
It is better thought of as adding Autodarts to Scolia. Nothing is permanently removed: the processing unit stays installed and usable, the cameras stay where they are, the lighting stays where it is. You are adding a second route for the camera signals, and that makes the whole modification easy to reverse.
Nor does it involve modifying or installing anything on the Scolia processing unit. Autodarts runs on a separate computer, both systems stay independent, and the switches simply decide which one currently has the cameras.
Do you have to recalibrate every time you switch?
You should not need a full recalibration just because you changed platform. The key is keeping each physical camera on the same switch and the same USB path — which is why the labelling in step 1 matters and why fixed cabling beats unplugging things by hand.
If you move a camera or change the camera ordering, expect to recalibrate. Our accuracy guide covers what actually moves the needle there.
- Can you run Scolia and Autodarts on the same dartboard?
- Yes, provided your Scolia installation uses the standard three USB-connected cameras and you have a separate computer for Autodarts. Each camera goes through a USB sharing switch wired permanently to both machines, so pressing three buttons changes which platform has the cameras. One board, one set of cameras, one lighting system, two platforms.
- Do you need a second set of cameras to add Autodarts to Scolia?
- No. That is the whole point of the approach — you reuse the cameras, mounts, lighting and cabling already installed around your Scolia board, and add only the switches and a computer.
- Does this modify or damage your Scolia system?
- Nothing is installed on the Scolia processing unit and nothing is permanently removed. The unit stays installed and usable, the cameras and lighting stay where they are, and you are simply adding a second route for the camera signals — which makes the whole modification easy to reverse.
- What hardware do you need to use Scolia cameras with Autodarts?
- Three USB 3.0 sharing switches (one per camera), matching USB data cables long enough to reach the second computer, and a computer to run Autodarts — a suitable laptop, a Raspberry Pi or a mini PC. Our USB switch kit is £39.99; a pre-configured mini PC is £149.99.
- Do you have to recalibrate every time you switch between Scolia and Autodarts?
- You should not, as long as each physical camera always stays on the same switch and the same USB path — which is why labelling the cameras and using fixed cabling matters. If you move a camera or change the camera ordering, expect to recalibrate.
- Can both systems share the same screen?
- Yes. A monitor or TV above the board can serve both, so the dartboard, cameras, lighting and screen are all shared. Exactly how you switch the display depends on how your setup is wired.
One dartboard. One set of cameras. Two platforms.
Our Scolia to Autodarts USB Switch Kit is the three switches this guide is built around. Add a pre-configured mini PC and you have everything you need on the computer side — both with free UK delivery and a free remote setup call.
Shop the USB Switch KitReady to buy?
Free UK delivery, posted in 3–5 working days, with a free remote setup call.
Complete Touchscreen Autodarts Setup
Mini PC, light ring with cameras, and an 18-inch touchscreen with its leads. No keyboard or mouse needed.
£448.99
Buy — £448.99Complete kit
Mini PC and light ring with cameras. Plugs into any TV or monitor you already have.
£299.98
Buy — £299.98Already own a light ring? Mount kits with cameras are £139.99.
Read next
Compatibility note: this guide is for Scolia installations in which the three scoring cameras connect to the processing unit by USB. Hardware revisions differ — check your own connections before buying components. autodarts.store is not affiliated with or endorsed by Scolia.